
Nanozoomer Basic Operation
Warning
Before beginning, have one of the core staff (listed here) look at the slides to confirm that there are no protruding coverslip edges. The Nanozoomer is very particular about slide size, any non-standard slides or protruding coverslips will cause it to fail. Also, make sure the slides have dried for 24 hours as any excess, wet mounting media can cause the scan to fail. If the coverslip if protruding, you can use the sand paper near the Nanozoomer to file it down. If a slide drops in the Nanozoomer, contact the core staff.
Loading Your Slides
Make sure the Nanozoomer is on.
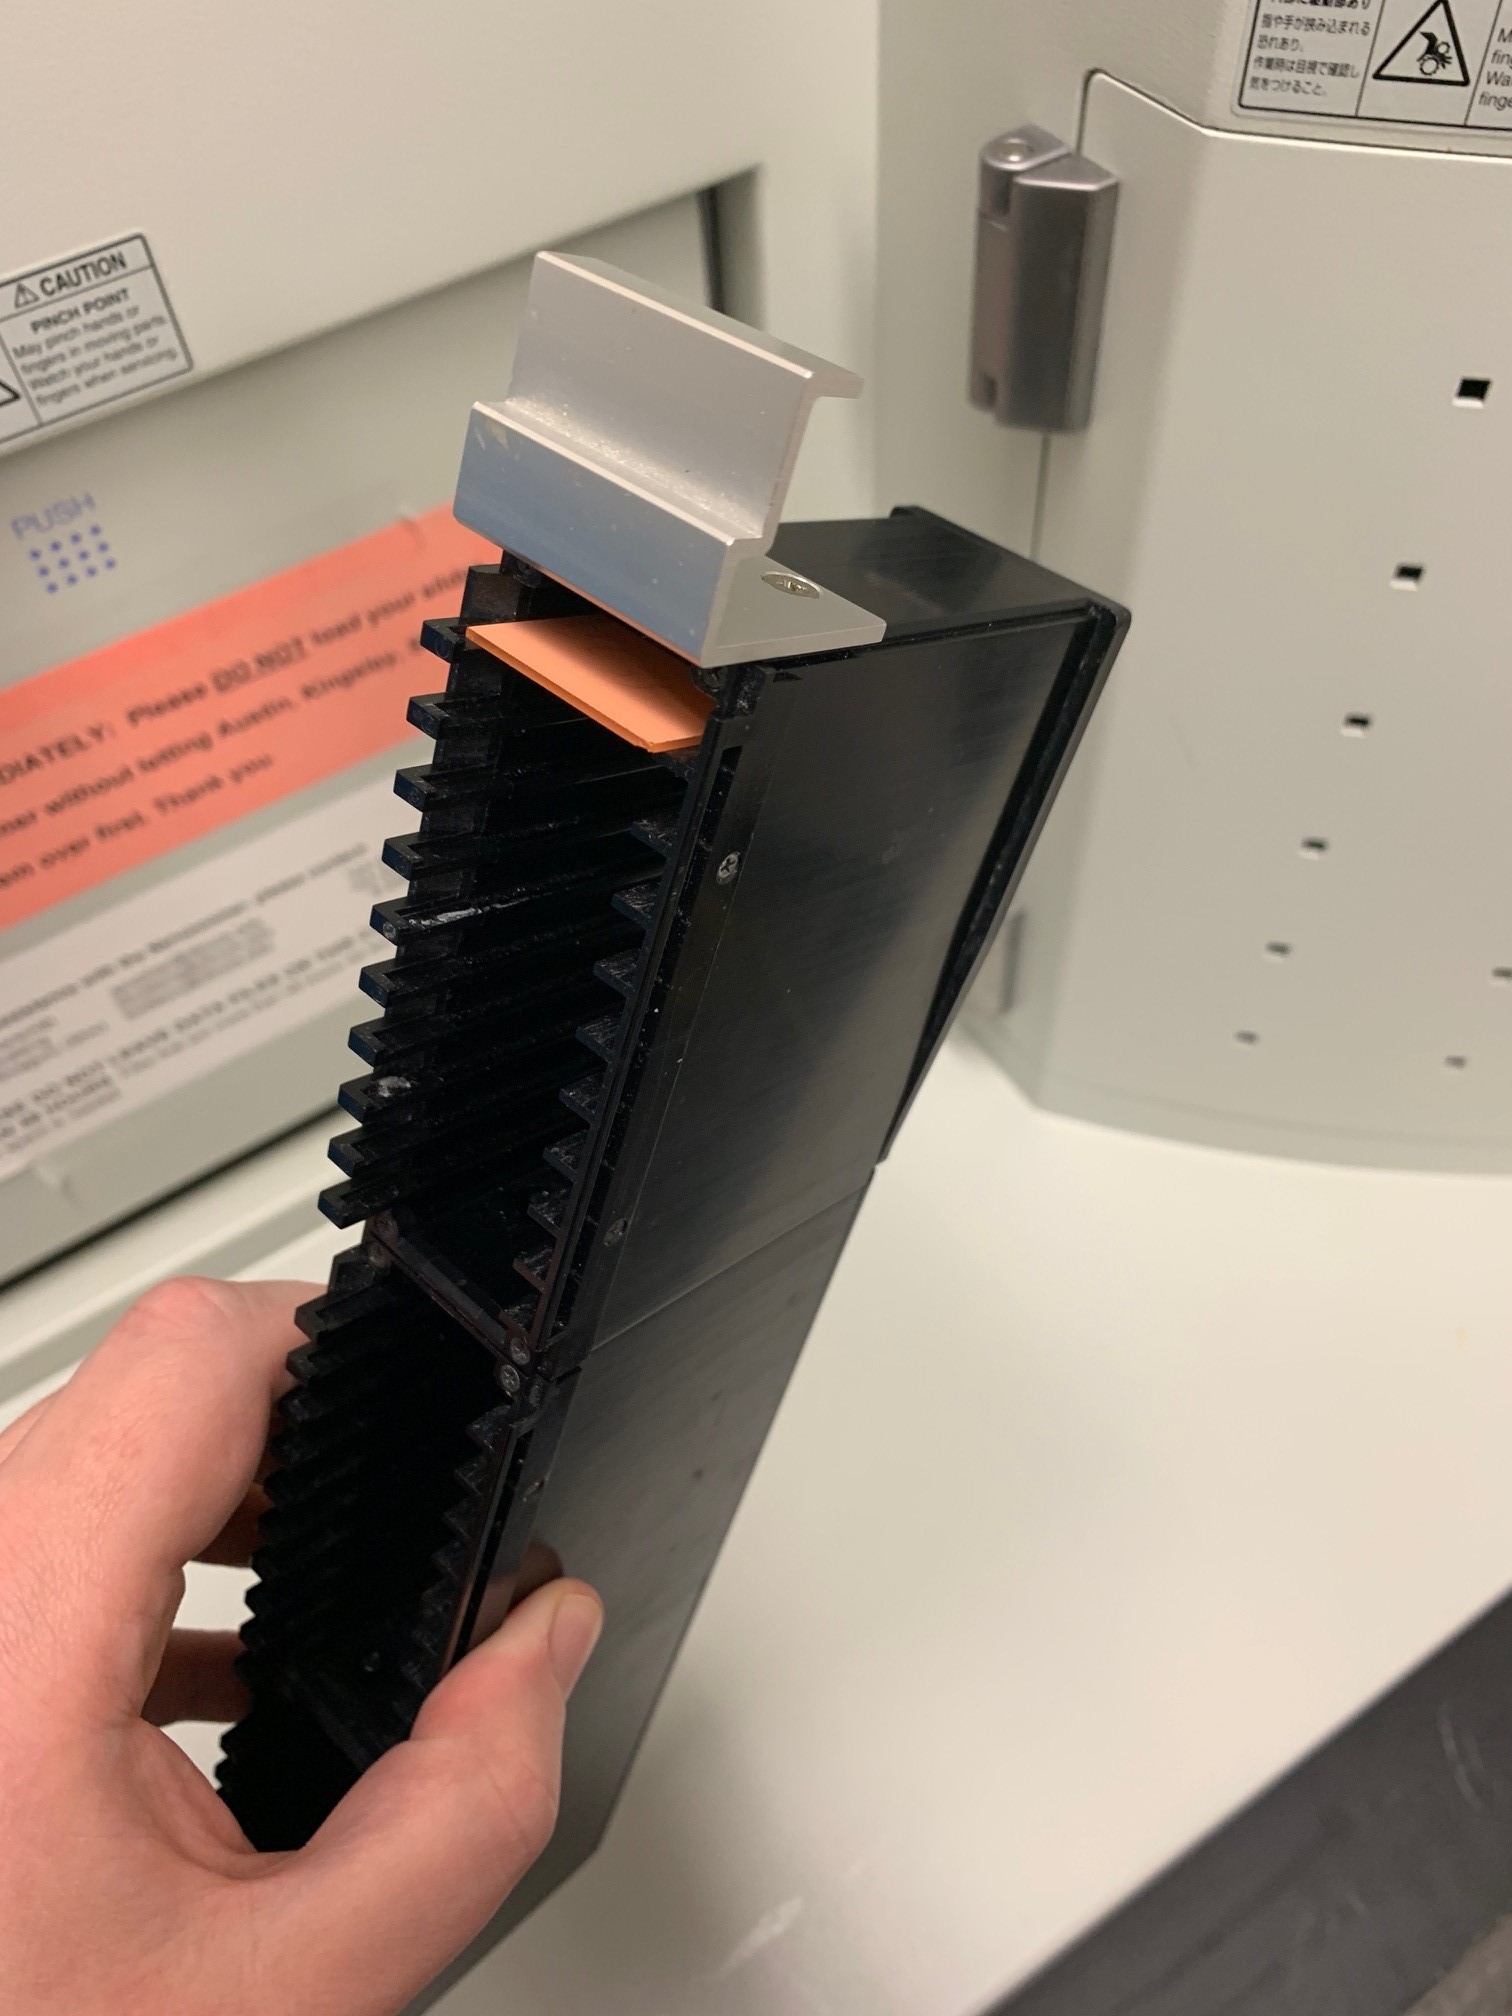
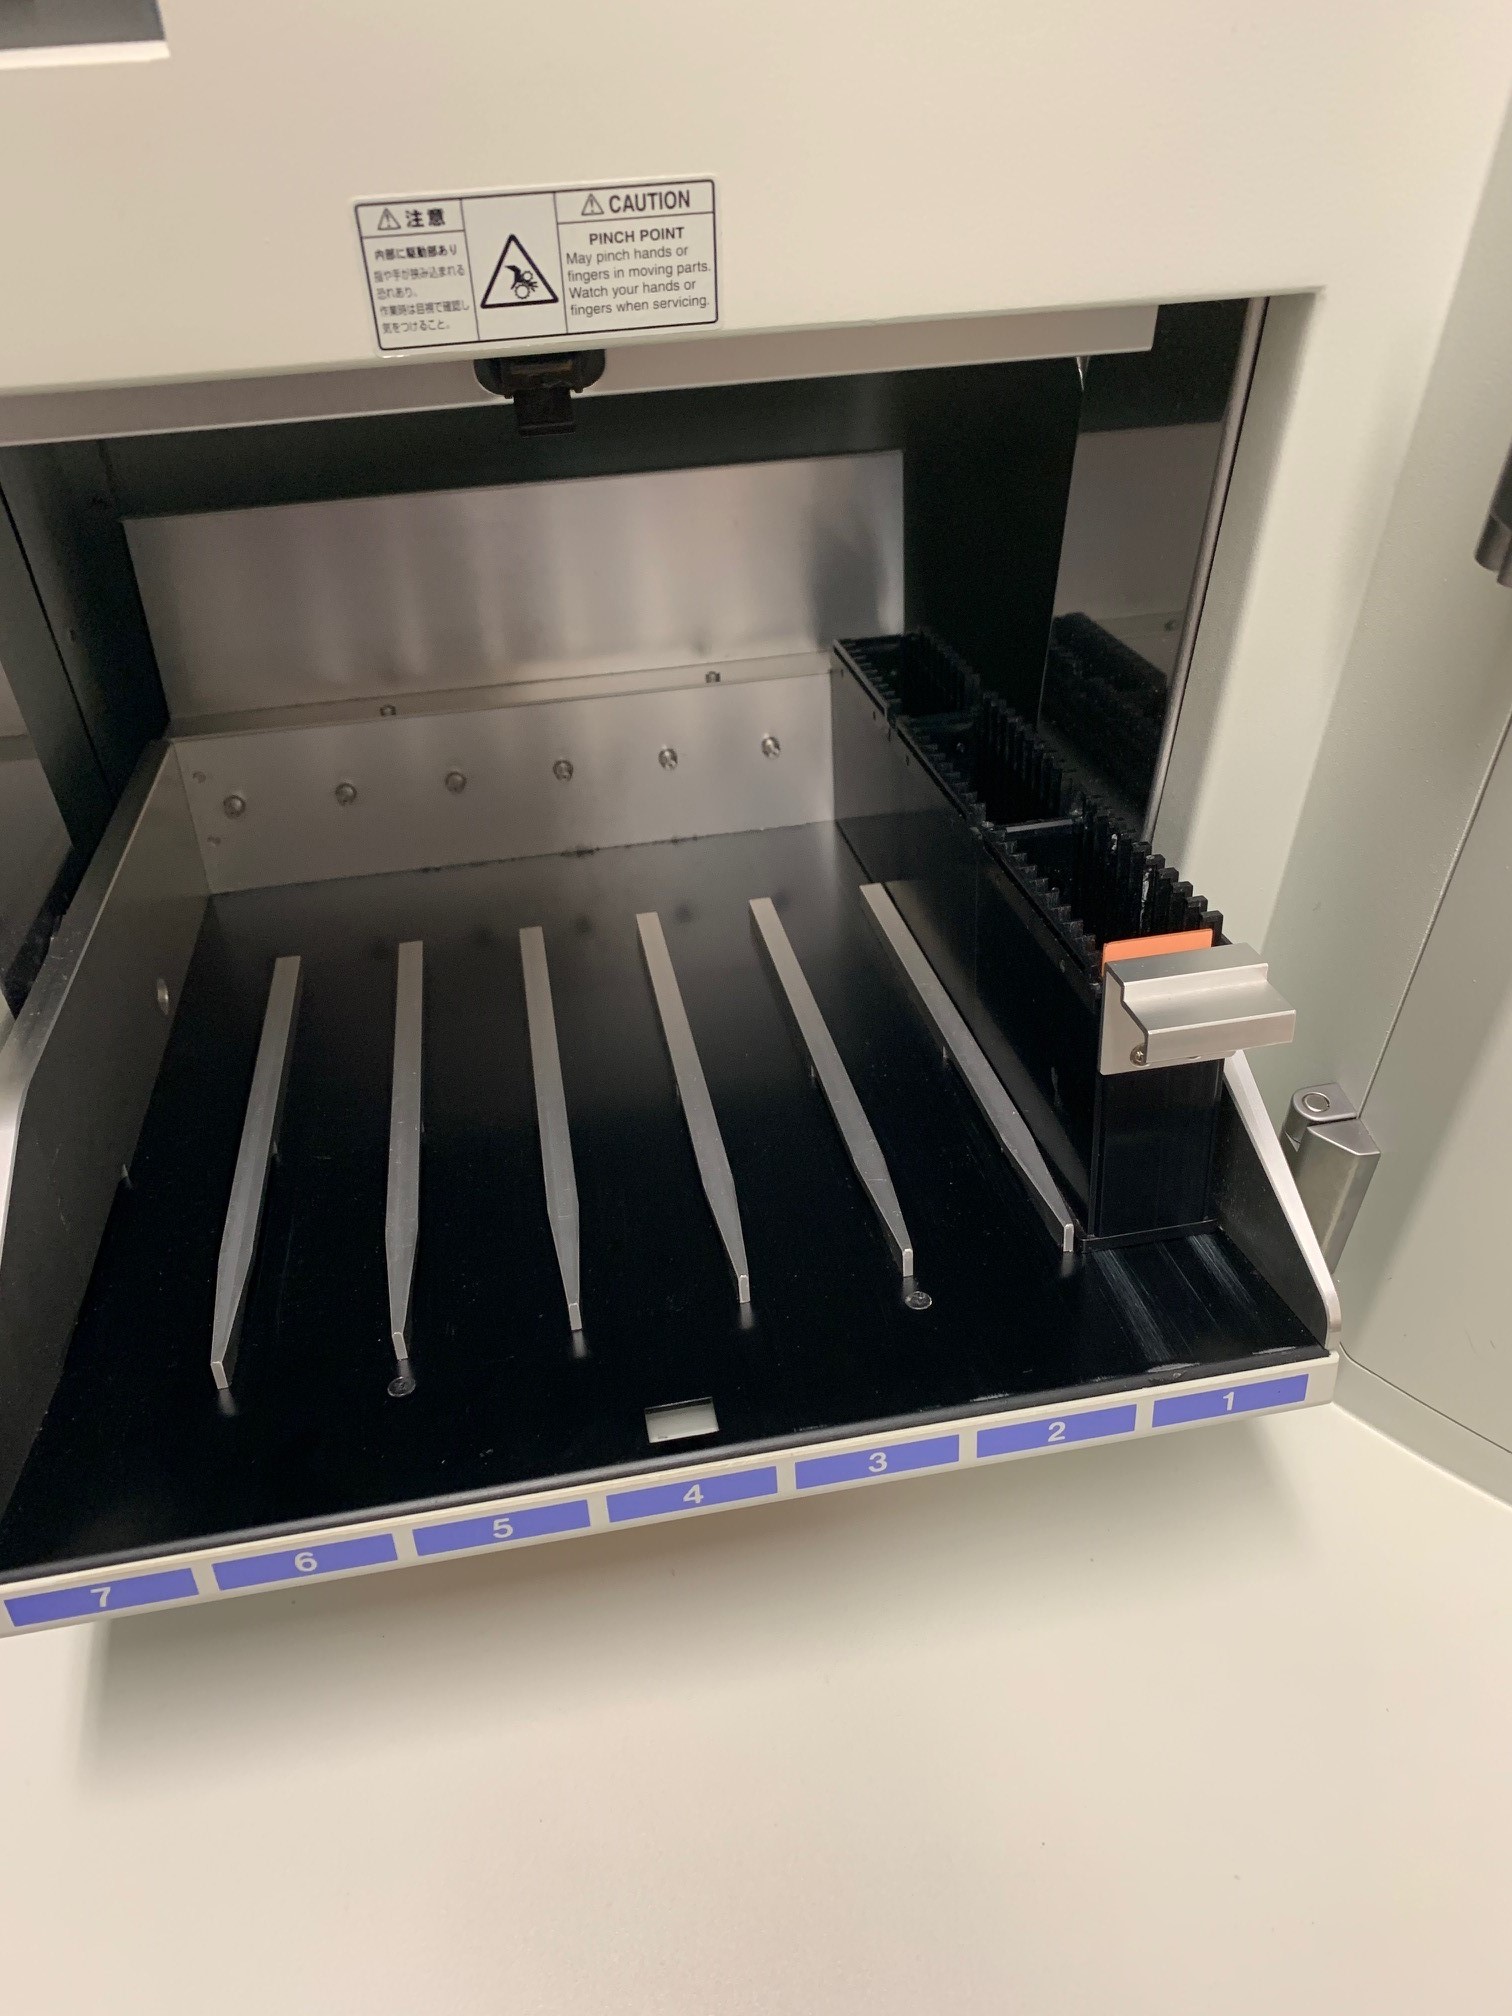
Load the slides into the cassettes with the coverslip facing up. Push the Nanozoomer door open and place the cassette into the first slot. You can put the 30 slides in each cassette and there are 7 cassettes, for 210 slides total. Note, if the yellow (busy) light or red (error) light are on then the door will be locked.
After the slides are loaded, close the door and log into the computer. Open the NDP Scan software.
Running a Scan
First we need to check the settings. These settings are profile specific. However, most users will use the same "Brightfield" profile. If you use the Nanozoomer often, please ask the core staff to make a specific profile for you. We generally done encourage individual profiles because it eventually slows the software down.
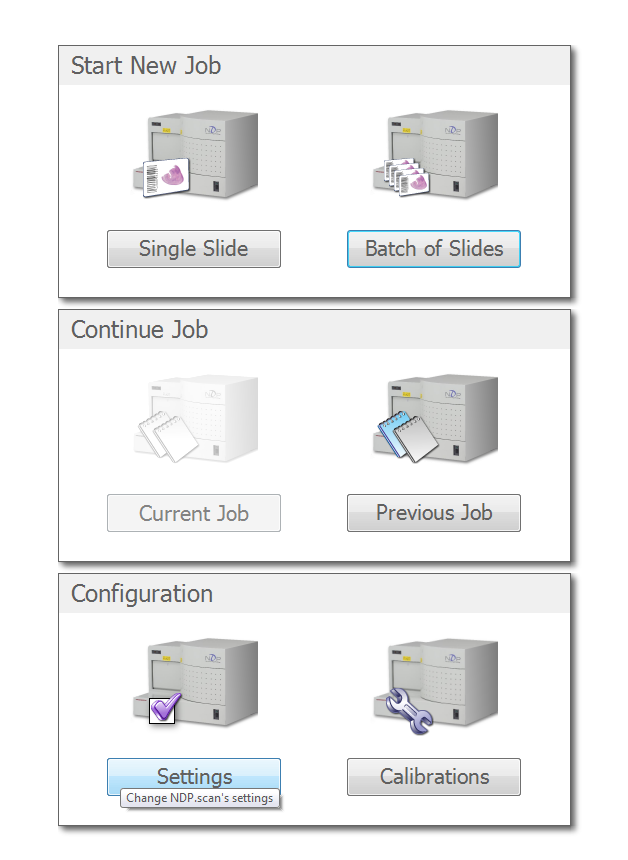
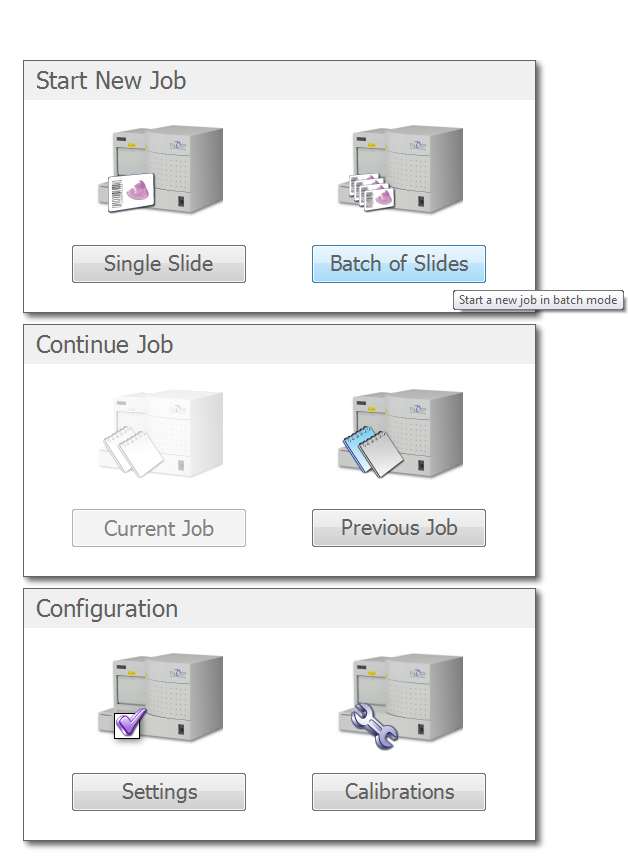
Choose the "Settings" button
Change the file path you want to save to. Click apply to save changes.

Open the general settings
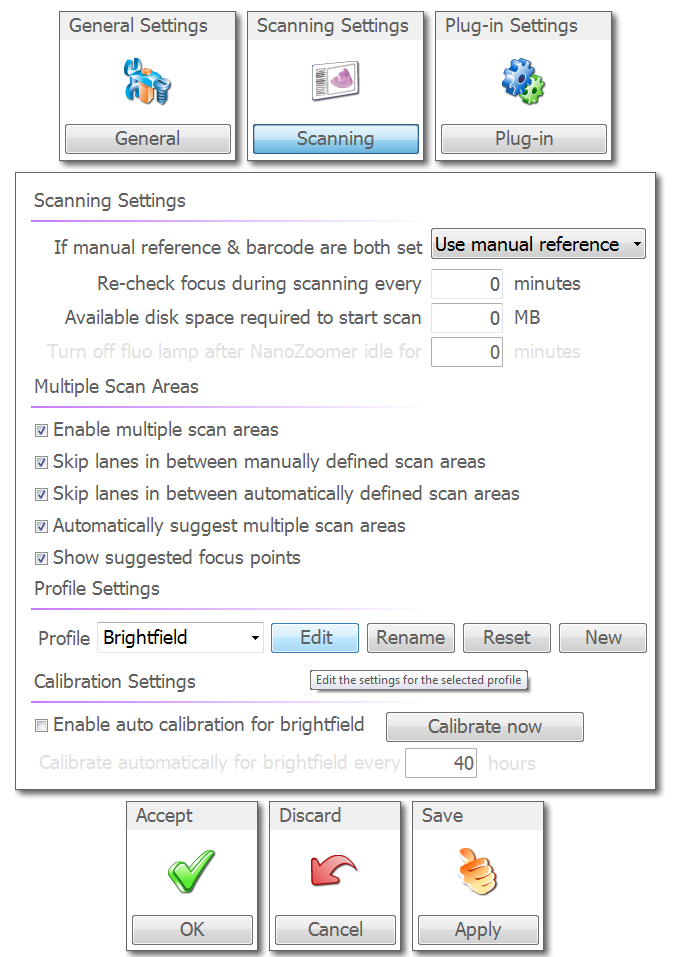
Leave the multiple scan area settings checked. Make sure the "Brightfield" profile is selected and choose "Edit."

The "Region" settings will be displayed first. You can leave the Scan Area as Automatic, the Focusing as 5pt Auto, and the thresholds at 10-90%. It is likely you want the coverslip filter enabled. Choose a minimum tissue size so that the program will not identify small objects. Set the Split Tissue setting to about 10mm. Set Focus Pieces separately and excluded the Excluded Area (this will make scans faster).
If you plan to manually identify your tissue, these settings are less important. If you plan to run the Nanozoomer in automatic mode, then it is important that these settings are correct. You might want to click the the load next slide button. This will load a slide and allow you to use the preview button to see how well the software is identifying the tissue region. If the preview does not look good, adjust the thresholds and minimum size and try again.
Once you are done here click "Apply"" and then click "Output" at the top.
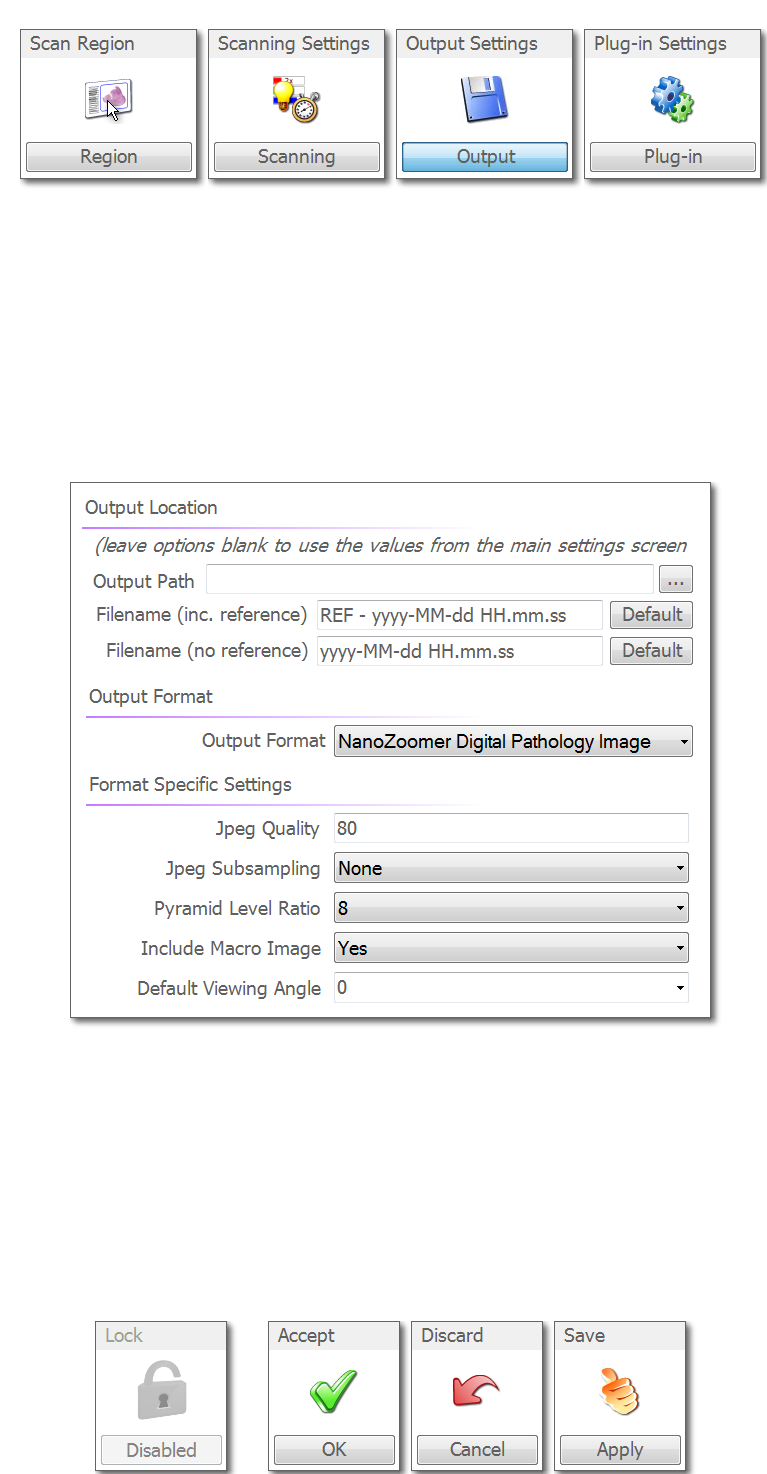
Just make sure the output path here is blank. If someone has added a file path here, then it will over write the file path you added in the general menu. Click "Apply" and then "OK" to return to the main menu.
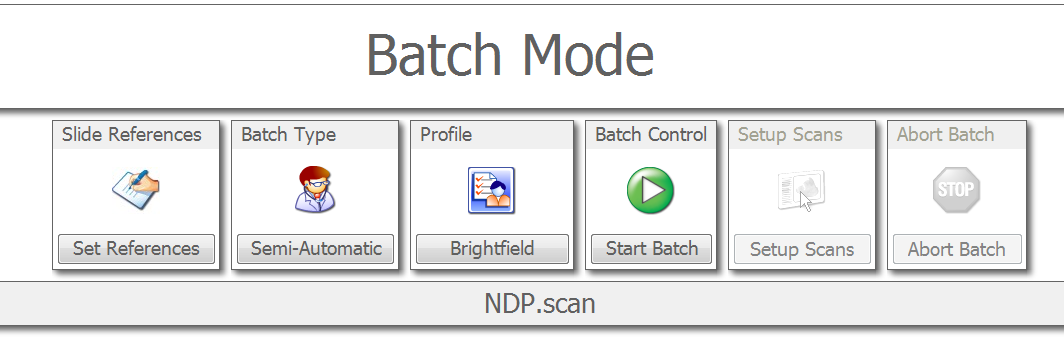
Running a Batch of Slides
At the top of the next screen, you'll need to choose your profile that we edited in the last section. Unless we created a profile for you, this will be the Brightfield profile. Choose Automatic or Semi-Automatic batch type. For Automatic, just click "Start Batch" and let the scan run. For Semi-Automatic, we need to verify the scan areas that the software suggests. Choose "Start Batch" to begin this process.
In Semi-Automatic mode, the Nanozoomer will load the first slide, take a quick black and white overview picture for the purposes of finding the tissue region, and then load the next slide. It will take all of the overview pictures before moving on to scan the slides.

You can right click on the the small image to see a bigger overview image. To change selected area, click on the "Setup Scan" on the right of the screen.
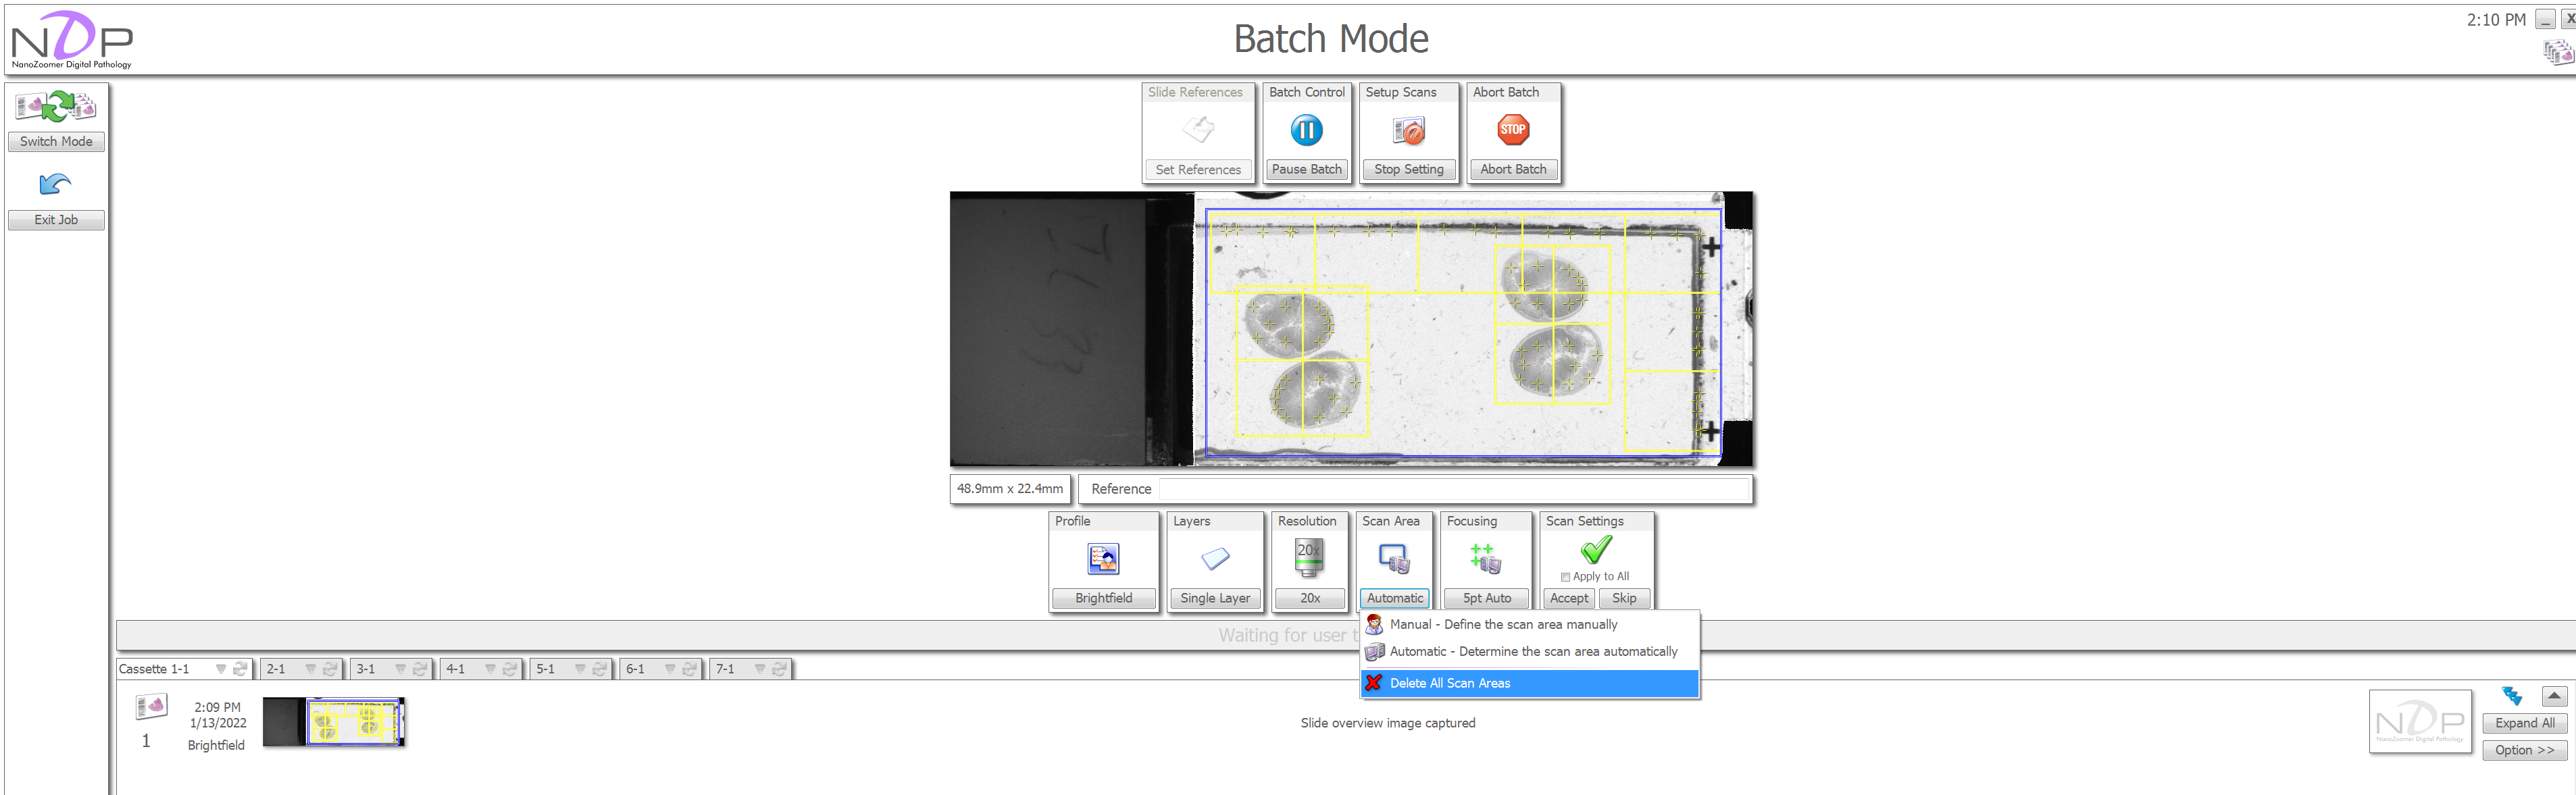
If you don't like the regions that the computer selected, you can click on the "Scan Area" icon and choose to delete the scan areas.

You can use the left mouse button to create a yellow region that covers the tissue. The blue rectangle cannot be adjusted directly, it is the boundary of all the yellow regions. You can add as many yellow rectangles as you like, generally you want to have on rectangle per tissue. You can use the right mouse button add focus points to the tissue. Add about 5 focus points per tissue region. Once you are happy with the scan regions, click "Accept" and the Nanozoomer will present the next overview image to you. You can setup the scan regions as the Nanozoomer begins scanning slides. If you don't see any issues with the scan region of the next few overview images, you can "Accept All." This will start the scan for all slides.

As the scans begin, a progress bar will appear with an estimate of the time remaining. If focusing fails, this will also be displayed here. Once a slide is scanned, the "Abort Scan" button will turn into a "View Scan" button, click this to open the slide in the NDPView2 software.
NDPView2
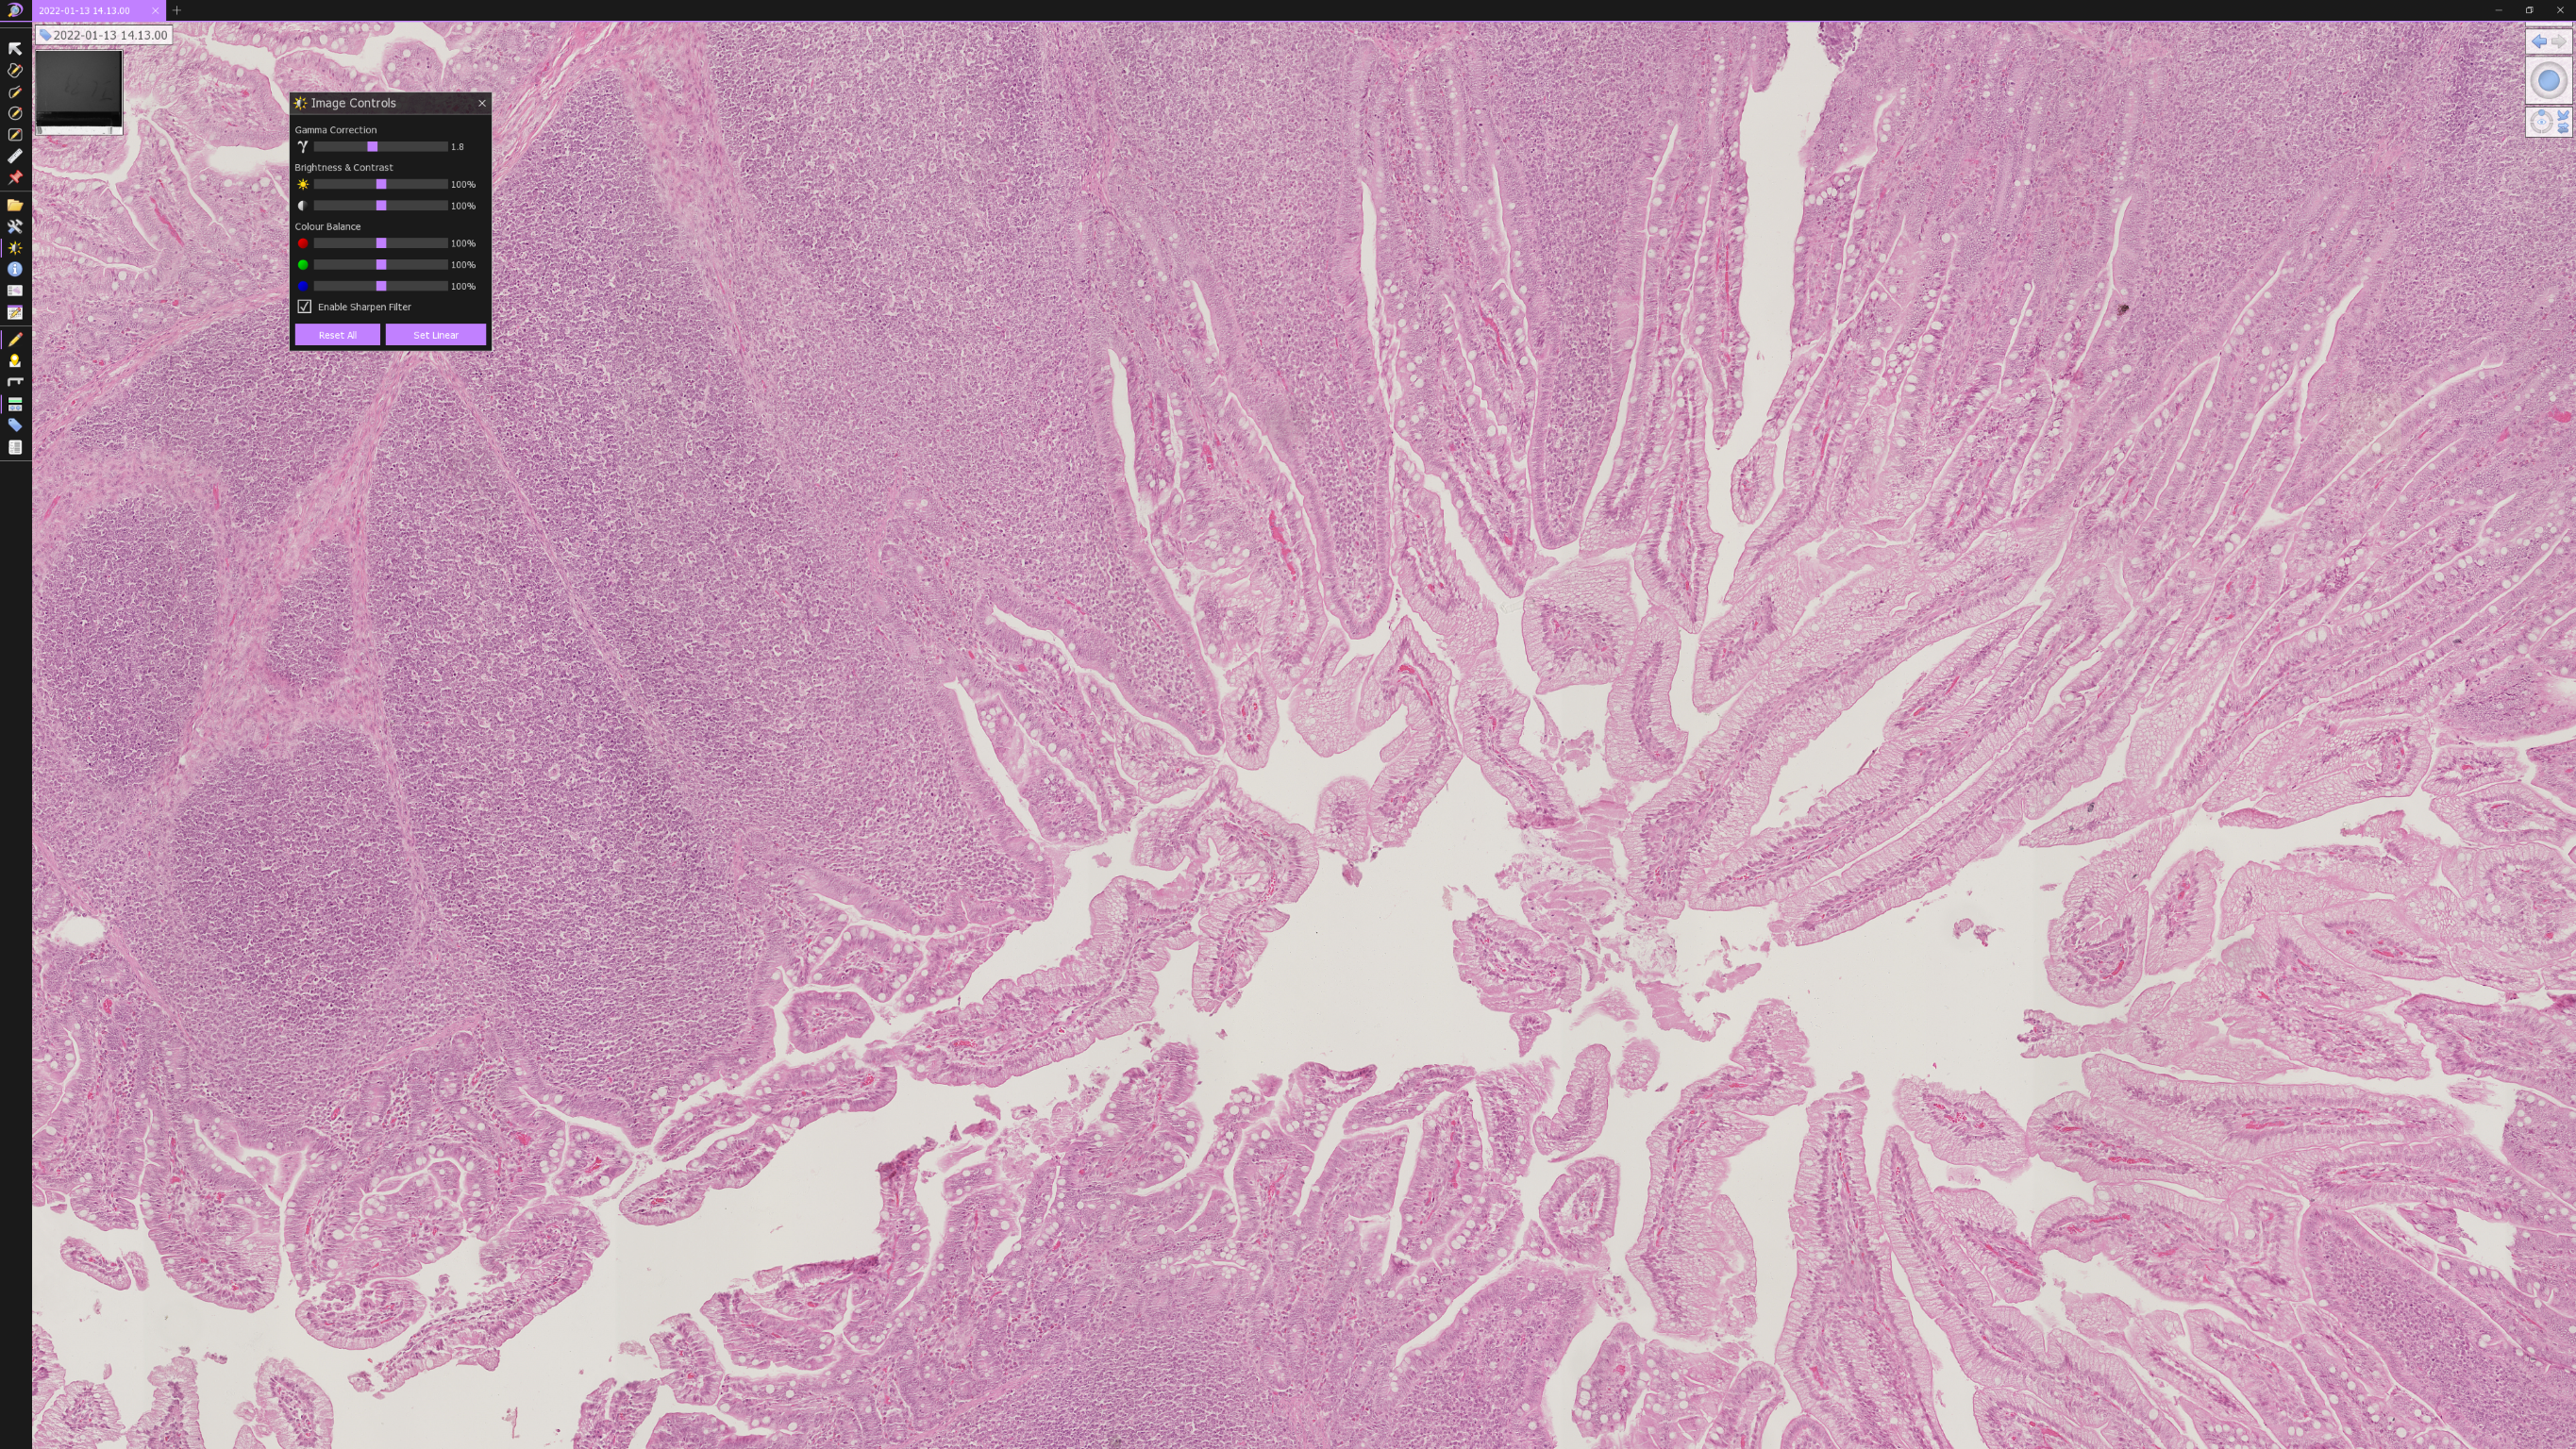
In NDPView2 (downloadable here) you can zoom in and move around in the slide you just scanned. If you move your mouse to the left of the screen, You can add a scale bar, annotations, and make color corrections to the slide. Moving the mouse all the way to the right will give you an option to select a zoom level (1.25x to 40x).
To save a tiff image, you can right click and choose to export as tiff. Be careful doing this, by default the image will only show the current field of view at the computer monitor's resolution (3840 x 2160).

The magnification chosen is important, if you go from a choose a higher magnification, the image size will jump to ten of thousands of pixels by tens of thousands of pixels. Most image analysis software will not work with images this large. In practice, just zoom and center the image around the features you want and right click to export.
Use escape, Alt+F4, or the x button in the upper right corner of NDPView2 to exit the software. This will bring you back to NDPScan. Also, remember in Windows you can use Alt+Tab (hold Alt and keep pressing Tab) to cycle between full screen applications.
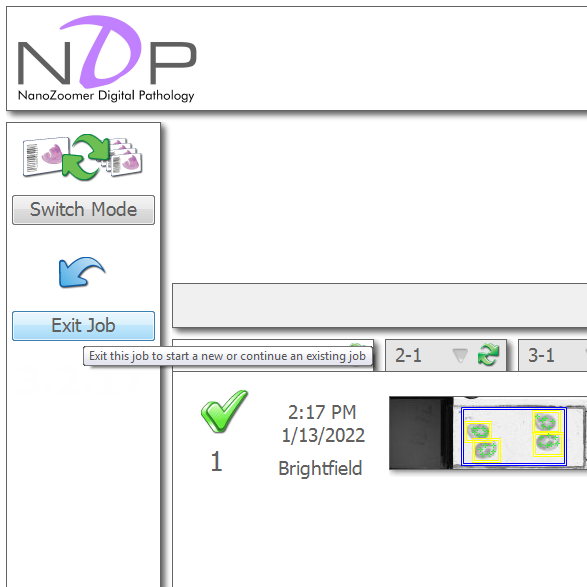
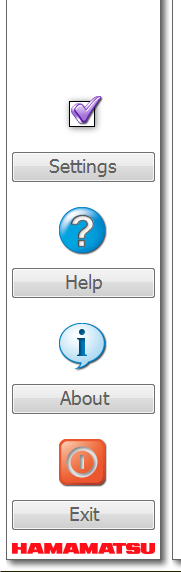
In NDPScan, choose to exit job (upper left) and then exit (lower left) to unlock the door and close the program.
Take your slides out and close the door. Transfer your files to the core server, then log off. You can leave the Nanozoomer on.