Nanozoomer Basic Operation
Warning
Before beginning, have one of the core staff (https://www.igb.illinois.edu/corefacilities/contact) look at the slides to confirm that there are no protruding coverslip edges. The nanozoomer is very particular about slide size, any non-standard slides or protruding coverslips will cause it to fail. Also, make sure the slides have dried for 24 hours as any excess, wet mounting media can cause the scan to fail. If the coverslip if protruding, you can use the sand paper near the nanozoomer to file it down. If a slide drops in the nanozoomer, contact the core staff.
Loading Your Slides
Make sure the nanozoomer is on.
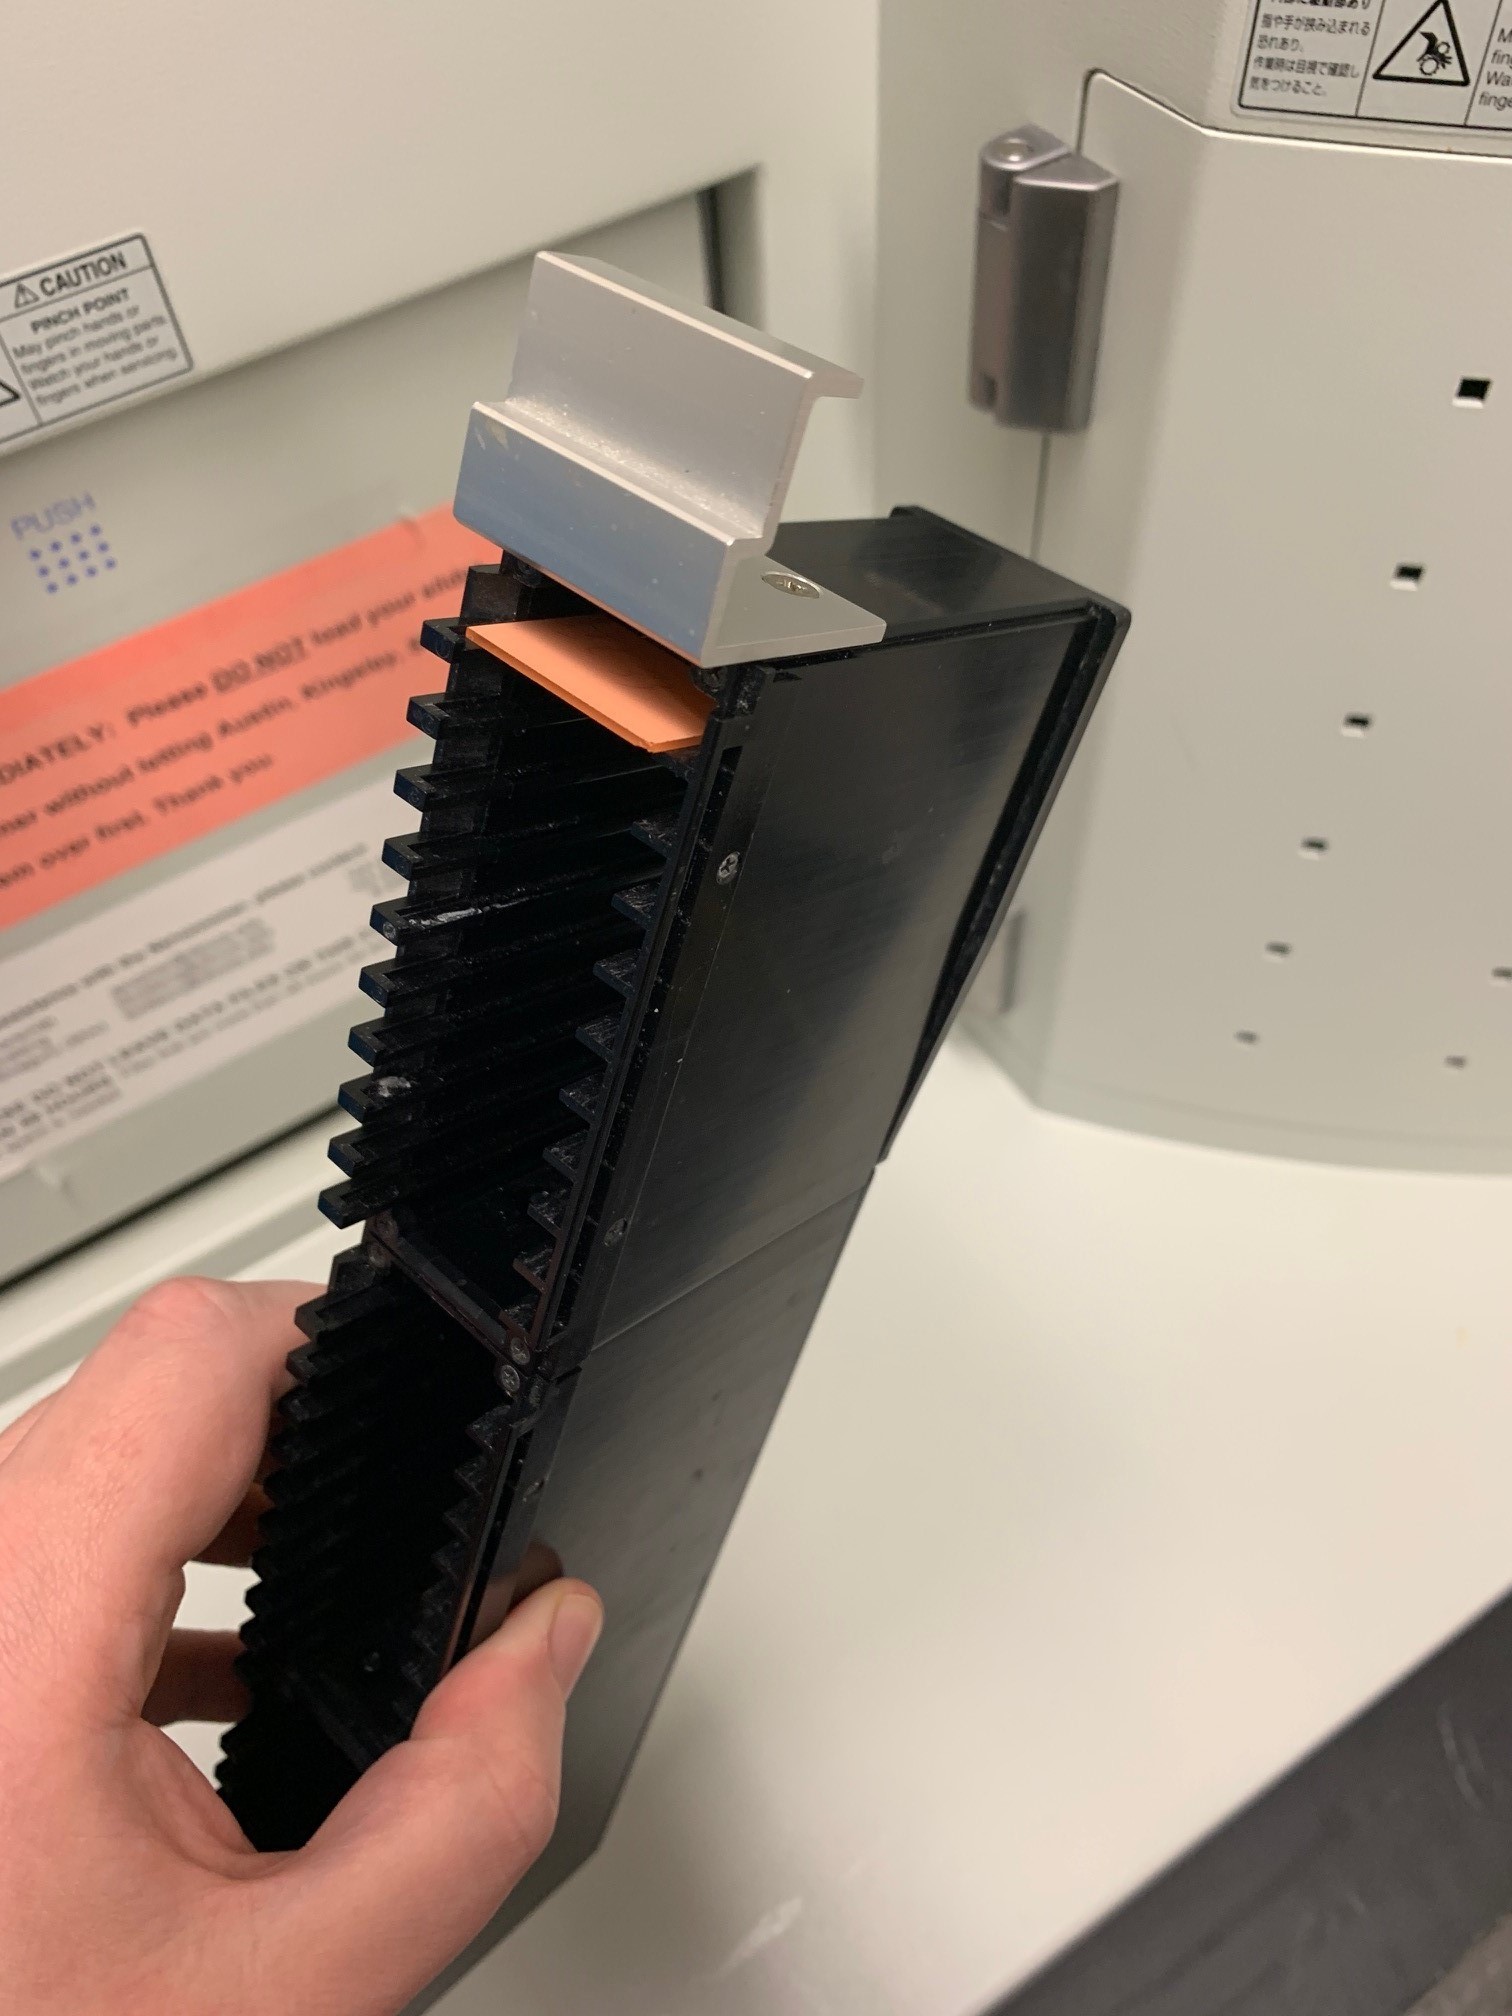
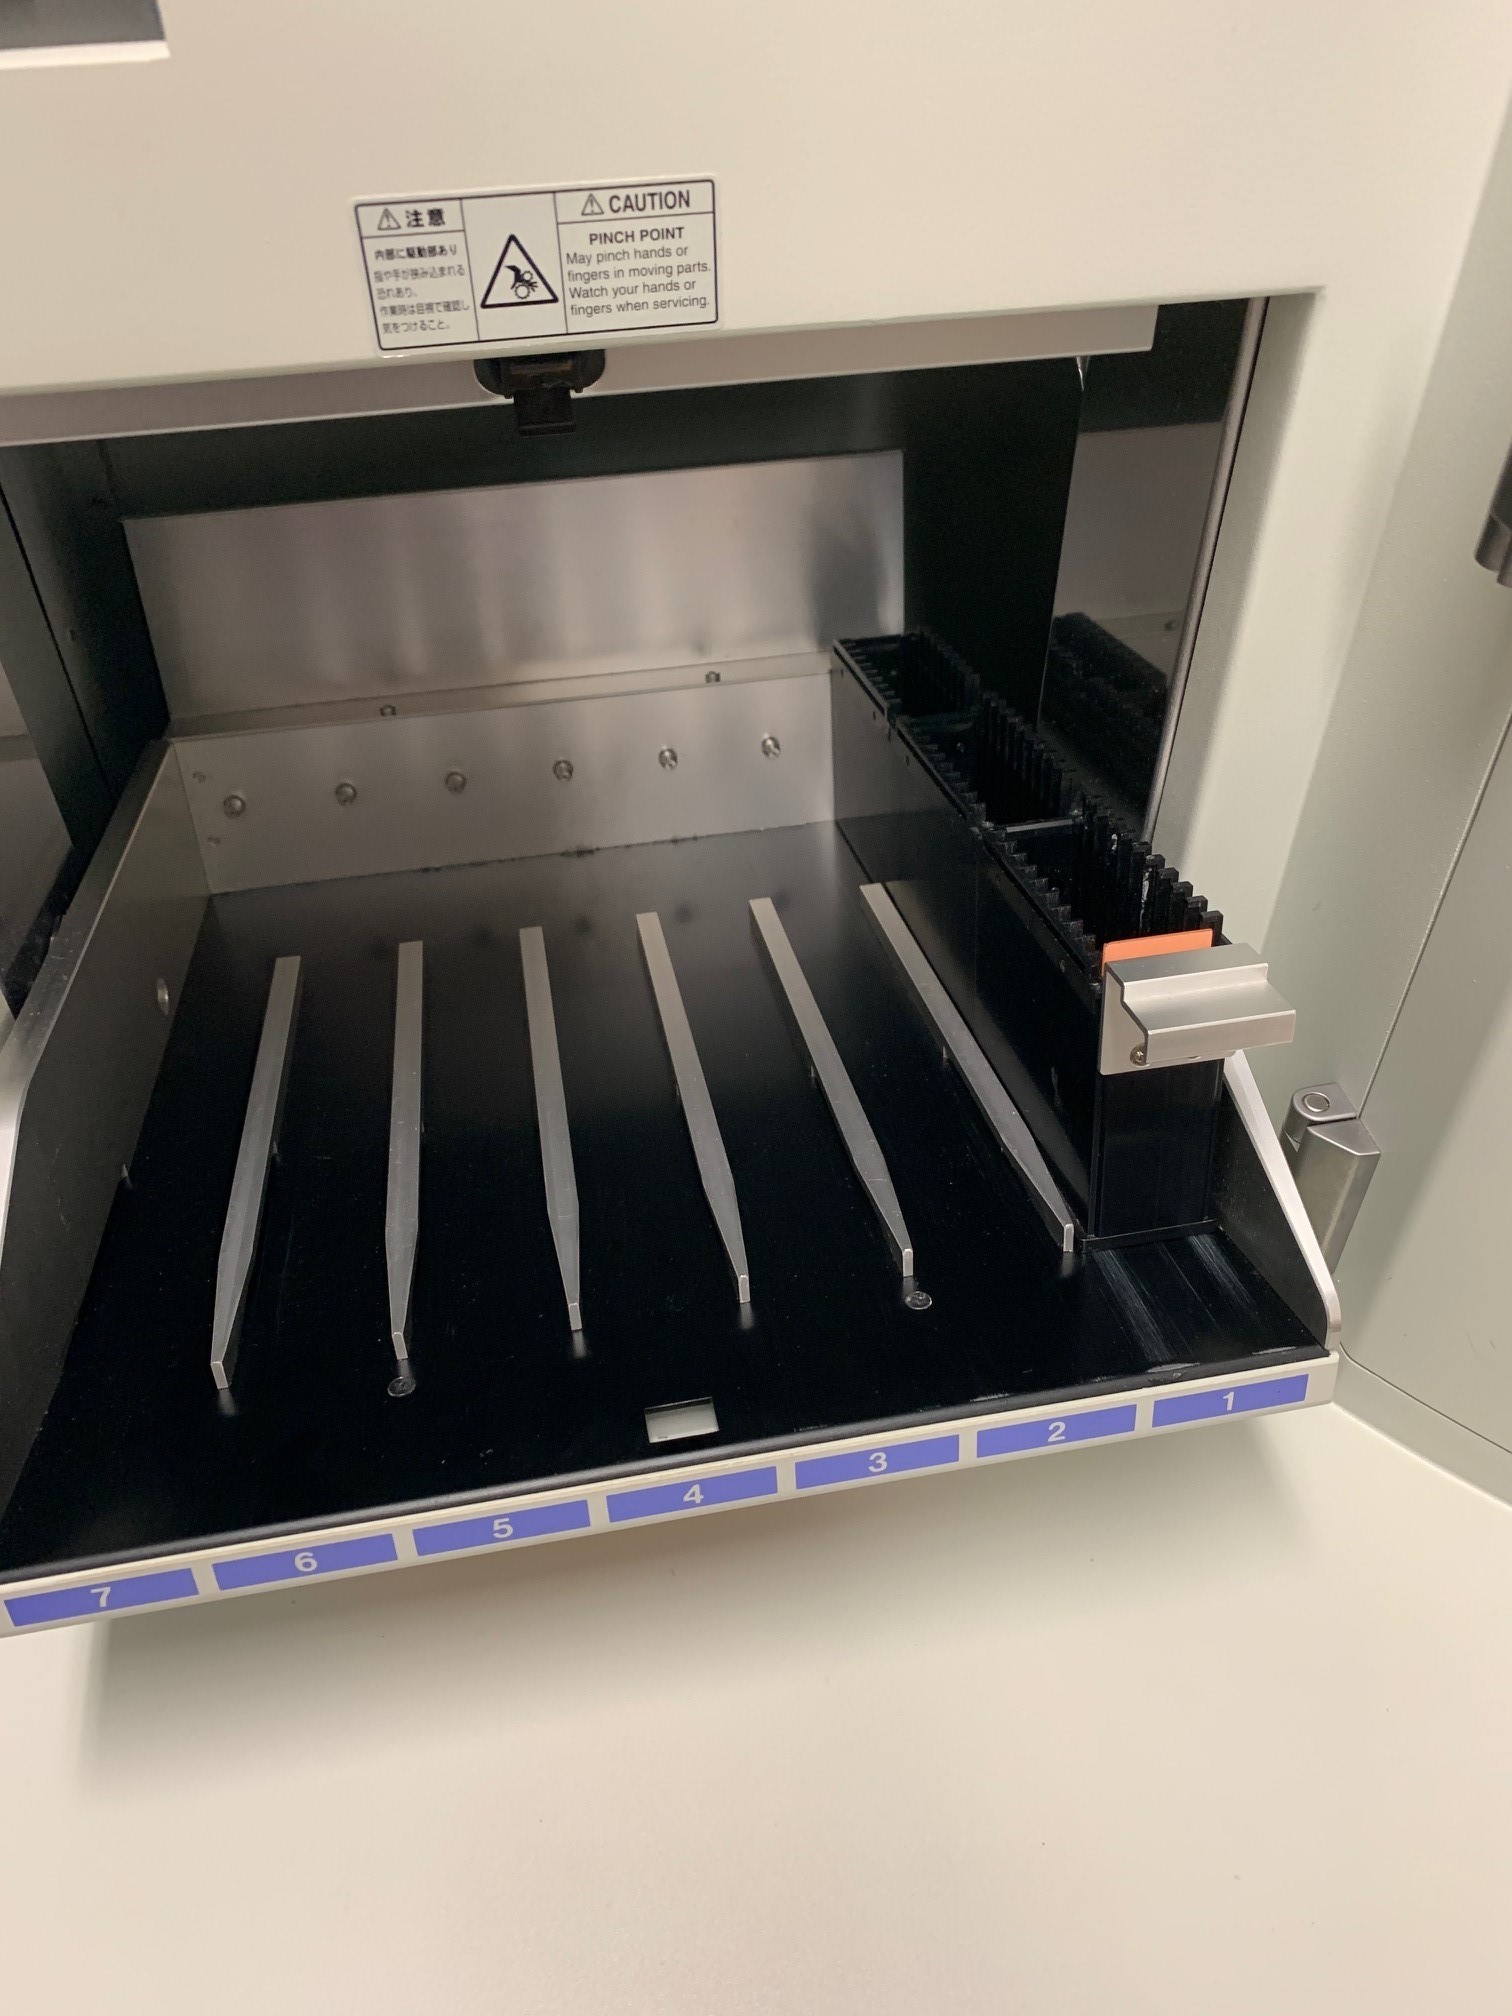
Load the slides into the cassettes with the coverslip facing up. Push the nanozoomer door open and place the cassette into the first slot. You can put the 30 slides in each cassette and there are 7 cassettes, for 210 slides total. Note, if the yellow (busy) light or red (error) light are on then the door will be locked.
After the slides are loaded, close the door and log into the computer. Open the NDP Scan software.
Running a Scan
First we need to check the settings. These settings are profile specific. However, most users will use the same "Brightfield" profile. If you use the nanozoomer often, please ask the core staff to make a specific profile for you. We generally done encourage individual profiles because it eventually slows the software down.
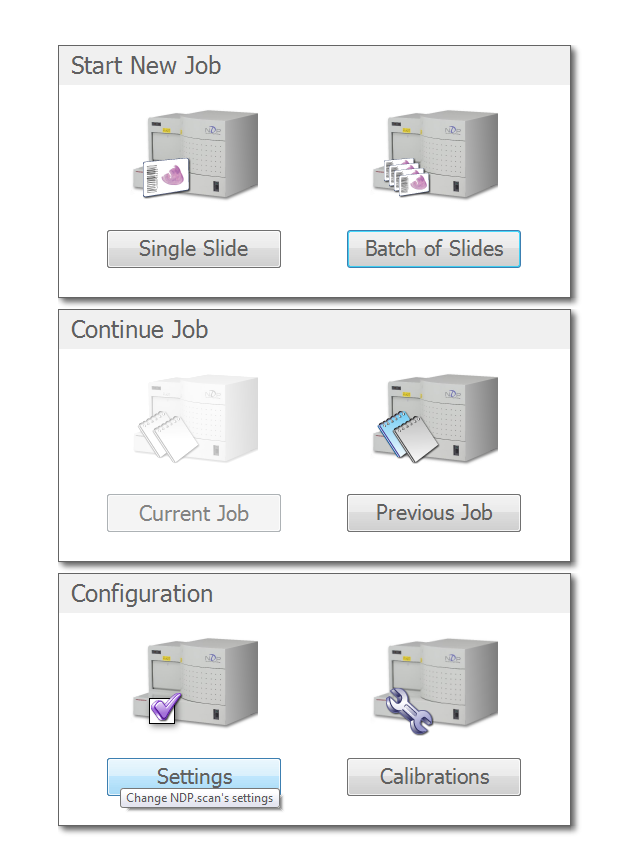
Choose the "Settings" button
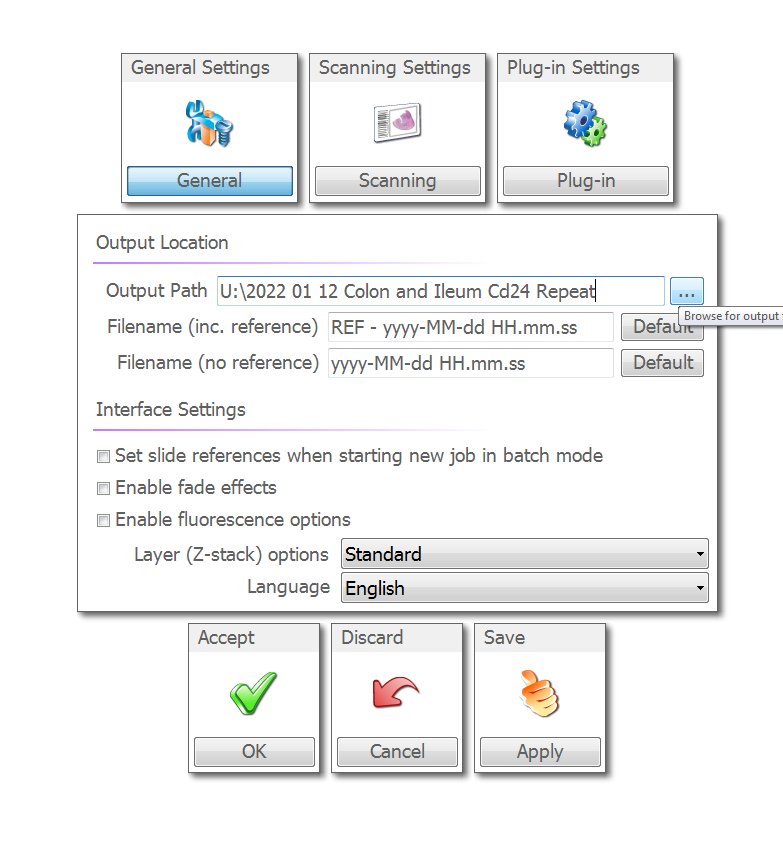
Change the file path you want to save to. Click apply to save changes.
Open the general settings


